It’s any wonder that any of the kit manufacturers stay in business with the speed at which their customers make their models (if I am a representative customer). I have heard it suggested that 75% of the kits purchased never get built anyway. I’m trying hard to get past this myself, by building a whole bunch of locomotives at the same time, but even this has taken much longer than I would have preferred.
The Five Shunter Challenge was my way of forcing myself to crack on with making models and to try and make myself worry less about everything being perfect, or there being an ‘ideal’ time to do this. Life often makes it clear that there is rarely an ideal time for anything and you just need to crack on!
The challenge had a good flow through 2014-2015 but it came to a grinding hold in July 2015 and I am only now starting to reacquaint myself with where I left the challenge back in 2015. I wrote a blog about my previous attempt at remembering.
The original plan was to build all of the locomotive chassis’ first, which has now almost been achieved (except for one loco).
The final chassis enters construction!
The Hawthorn Leslie 0-6-0DE has been lagging behind all of the other models in the challenge, and today I decided to change that and start work on the chassis.
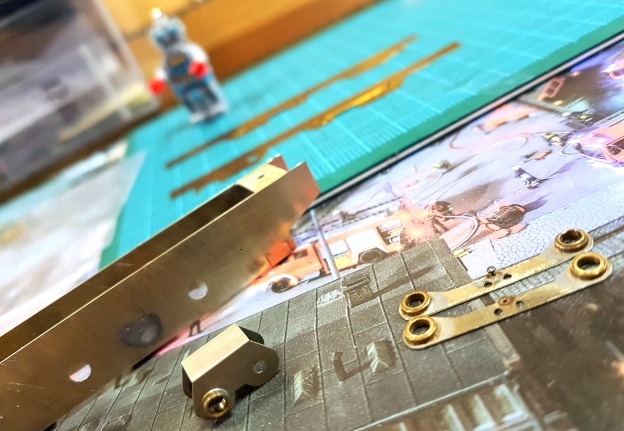
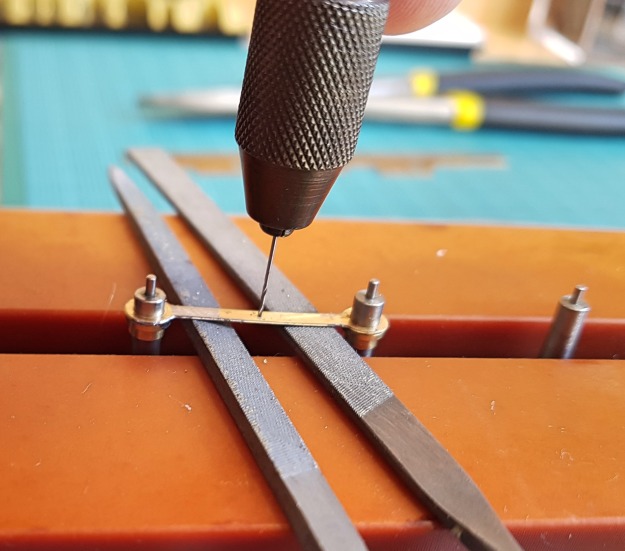
After some test fitting and a bit of filing, I plucked up the courage to set up the side frame on my chassis jig and soldered down the one set of axle brushes in a fixed axle. The balance beams were also soldered up on the chassis rig, but I put some paper between the beams and the side frame (to prevent the beams soldering to the side frames). I then soldered the spacers onto one side of the frame and then soldered the opposite part of the frame on top of it all. This was all achieved easily by lining up the jig using the locos coupling rods. I had to widen the holes in the rods a little to do it, but I only used x2 parts of a layered etch, so I don’t think there will be any issues with the final coupling rods.
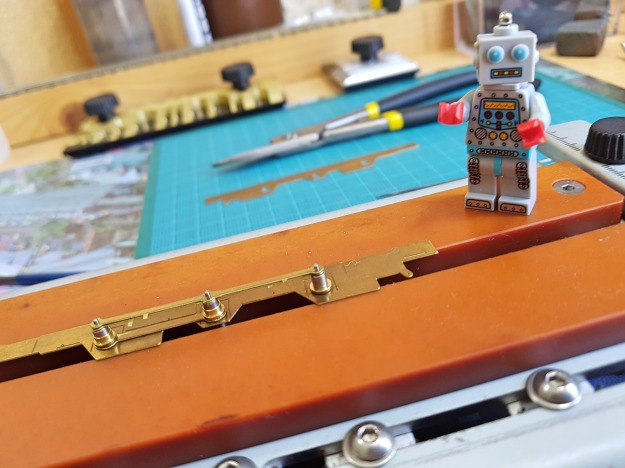
English Electric/Hawthorn Leslie 0-6-0DE (Judith Edge Kits) on the chassis jig with coupling rods fitted to the jig axles.
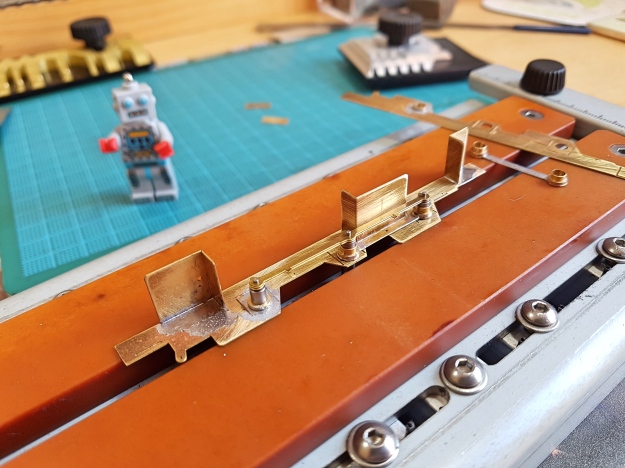
Spacers soldered onto one side of the chassis frame for English Electric/Hawthorn Leslie 0-6-0DE (Judith Edge Kits)
The pivot hole is missing from the balance beams (as described in the instructions), but it is easy to mark up and drill out once you have everything in the right place.
Drilling out the hole to pivot the compensation balance beams for English Electric/Hawthorn Leslie 0-6-0DE (Judith Edge Kits)
The chassis came together really easily, but I can tell that I have slightly twisted one of the balance beams, as the axles can be a little tense within the chassis.
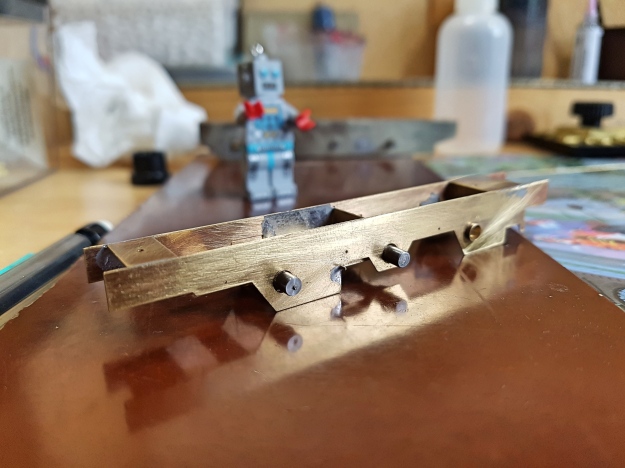
The completed chassis for the English Electric/Hawthorn Leslie 0-6-0DE (Judith Edge Kits)
The underneath of the chassis for the English Electric/Hawthorn Leslie 0-6-0DE (Judith Edge Kits) including compensation balance beams
Fixing previous (and forgotten) chassis mistakes
My poor model of the Bulleid Paxman 11001 Shunter hasn’t really had any work progressed on it since January 2015 (see the previous blog), where I built the balance beam system. Upon returning to the Five Shunter Challenge, I was somewhat perplexed as to why the balance beams had been removed.

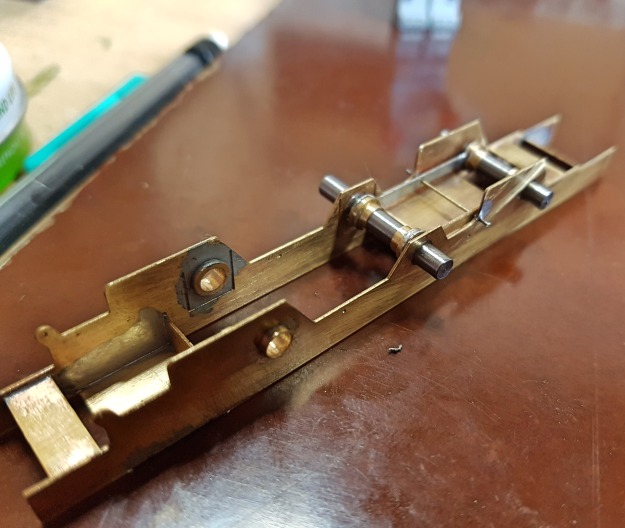
The compensation balance beams and chassis for 11001 Bulleid Shunter (Judith Edge)
I think I removed them because there wasn’t enough clearance to include the width of the axle brushes AND the gearbox brushes, or they just came free in a test fitting (the real is lost to time and a bad memory).
Although I was happy with fitting the balance beams using track pins, I did find this left them quite vulnerable to being de-soldered while testing fitting parts and I would really like to find a way of ensuring the balance beams stay flush to the insides of the frames. I have seen someone use springs threaded around the axles to achieve this, so I might try this later today.
For now, I have replaced the track pins with a single brass rod which feels much more structurally sound. The brass rod doesn’t stop the balance beams flapping around inside the chassis, but it greatly reduced the chance of them breaking free (as they are fixed at either side of the chassis).
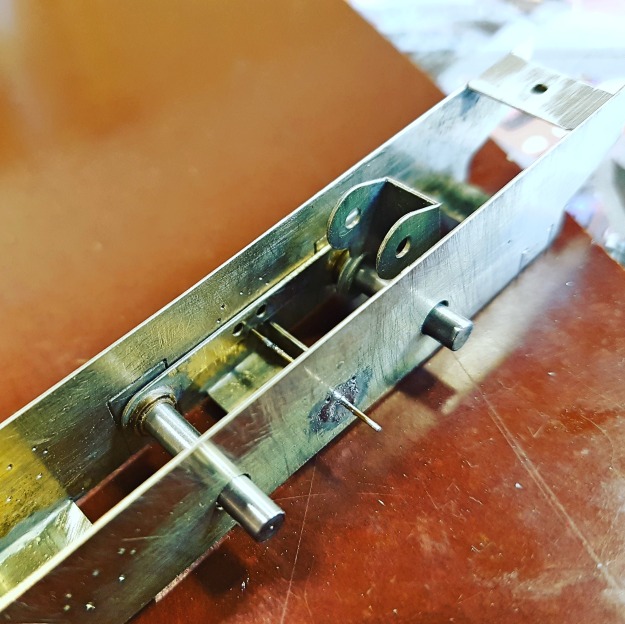
The compensation balance beams and lower gearbox for the 11001 Bulleid Shunter (Judith Edge)
How does everyone else keep their balance beams flush to the side frames?
The next step for this loco is to build up the gearbox.
P.S. I see Mr Edge of Judith Edge Kits has responded with some suggestions as to how to fix the balance beams flush, so I will try out some of his suggestions some other time
Here are some notes on progress for each of the locos:
x5 Shunter Challenge Progress
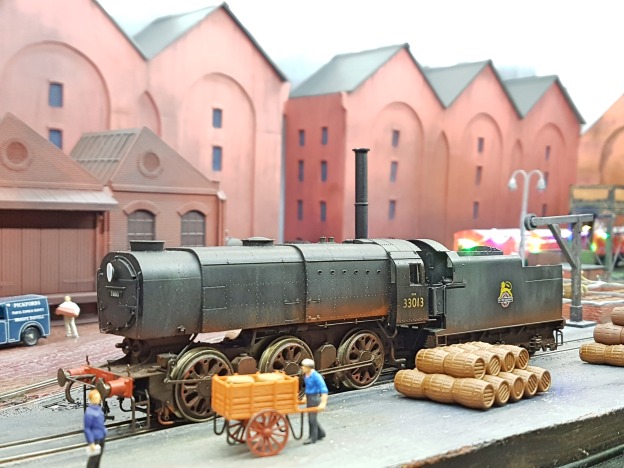
BR Class 02 Diesel Shunter – DJH
Chassis complete and ready for final bodywork and paintshop
Sentinel post war 100HP 0-4-0VBT – RT Models
The Sentinel chassis and gearbox is complete, other than fitting a white metal ash pan beneath the chassis, which I didn’t do as it doesn’t quite fit, and I wanted to fit the body first. I am itching to fold up the frames, but I am going to try and hold back for now. Annoyingly, a few very fine bits of etched details have been bent out of shape while I played with the etched frames (that will teach you not to fiddle with things, Tom), but I have unbent the damaged bits for the moment.
Ruston & Hornsby 88DS – Judith Edge
The Ruston 88DS has a completed chassis and gearbox and is also ready for the frame build. Both this kit and the sentinel have the same super small gearbox.
For some reason, I seem to have removed the inner plastic wheels from the tyres, and I can’t remember why (it might have been to do with rust).
11001 – Judith Edge
The balance beams are re-attached using brass rod across the chassis frame, but I may still include a different system of keeping them flush to the side frames. This loco also has a High Level Kits slimline chassis to be fitted, and I have started building the motor harness, but never got around to fitting the gears.
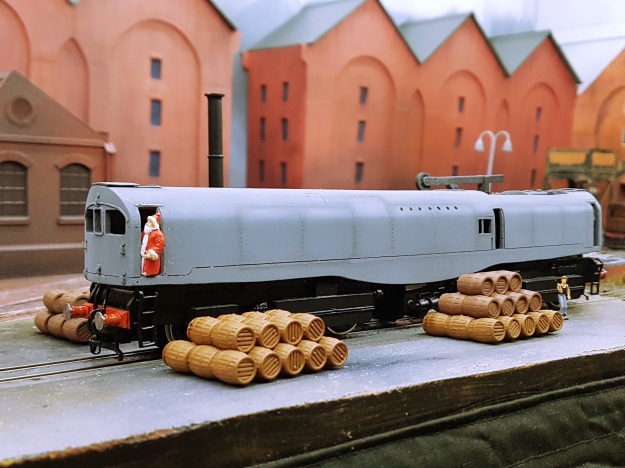
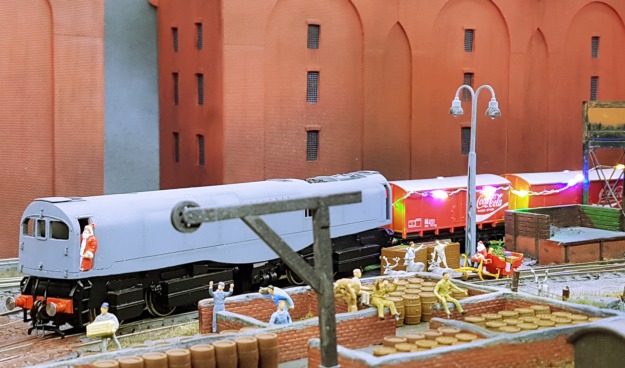
English Electric/Hawthorn Leslie 0-6-0DE – Judith Edge
The Hawthorn Leslie chassis is complete and balance beams are fitted. Similar to 11001, it needs a method of keeping the balance beams flush to the frames. There is also the outside frame to consider too (and the gearbox).
Grasslands Out!!!